CS 354 - Running XINU on VirtualBox
Tired of SSH-ing into one of the XINU frontend machines? Tired of waiting 30 seconds for the Intel Galileo boards to boot? Then this page just might help you out! Here is how you can run the XINU kernel/OS on VirtualBox (or any hypervisor of your choice, really) or any x86_32 (i386) machine!
Steps
Patch for x86_32 support
The codebase given by the CS 354 course only supports the Intel Quark processors on the Galileo boards, which means that parts of the code initialize the hardware while assuming it is a Quark processor. This means that things like console printout won’t work, since the code tries to directly map to Quark’s UART device for serial, for example.
Thus, we need to patch in x86_32 (i386) support. Luckily, there is already the modified codebase available on XINU’s official website. However, this requires a separate builder VM, and a backend VM that loads the image the same way the Galileo boards do — via TFTP and xboot.
We can do better than that and cut out the middleman by building an ISO image that will load grub the bootloader, which will directly load the XINU executable. (This is possible because the generated executable has a valid Multiboot header.)
First, grab an unmodified copy of the XINU codebase, and preferably create a branch since this will overwrite Quark support. (Did I mention the image won’t be bootable on the Galileo boards after the patch? Well I did now)
Then apply the git patch from this Gist.
This patch contains the following (well it’s really four commits squashed together since I can’t make the repository with all my solutions public something something academic dishonesty something):
- x86_32 (i386) support (which replaces Quark support)
- Patched out Ethernet and Ethernet initialization routines (not needed in CS 354)
- Makefile changes and a
grubISO generation script
After applying the patch, run off a build with make. You should now see a xinu.elf file instead of the usual xinu.bin or xinu.xbin file.
Generate the grub ISO
Next, run the mkiso.sh script to generate the ISO.
Do note that the script requires grub-mkrescue, which is part of the (usually named) grub2 package. grub-mkrescue depends on xorriso, which is part of the (usually named) libisoburn library.
…did I mention that data.cs.purdue.edu has grub-mkrescue but not xorriso? Well I did now
If you use NixOS, did you know that you can create an environment with all the necessary dependencies with one command?
# If using regular channels
nix-shell -p grub2 libisoburn

# If using nix flakes
nix shell nixpkgs#grub2 nixpkgs#libisoburn
Once the script finishes, you should see a xinu.iso image in the compile/ directory!
Creating a XINU VirtualBox VM
If you load up the xinu.iso, VirtualBox should automatically detect most settings and configure the machine type to Other/Unknown. Just modify the base memory to about 256 MB (which is similar to the Galileo boards) and leave CPU count at 1 core. You can skip creating a virtual hard disk by selecting “Do Not Add a Virtual Hard Disk”.
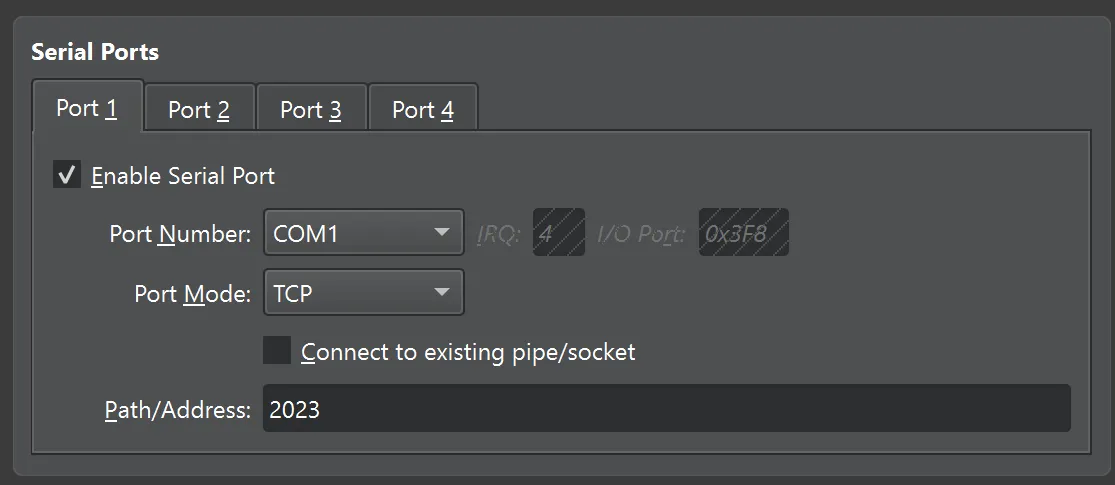
Once the VM is created, we need to set up serial. One quirk of XINU is that it doesn’t print to the VM console and prints to serial instead. So open up the VM settings and find the section labeled “Serial Ports”.
Under “Port 1”, select “Enable Serial Port”, then leave “Port Number” as COM1. Set “Port Mode” to “TCP”. Uncheck “Connect to existing pipe/socket” and type in a port number of your choosing in “Path/Address” that is higher than 1024.
Booting the VM
After launching the VM, you should see the grub bootloader. Do not press Enter to boot XINU just yet!
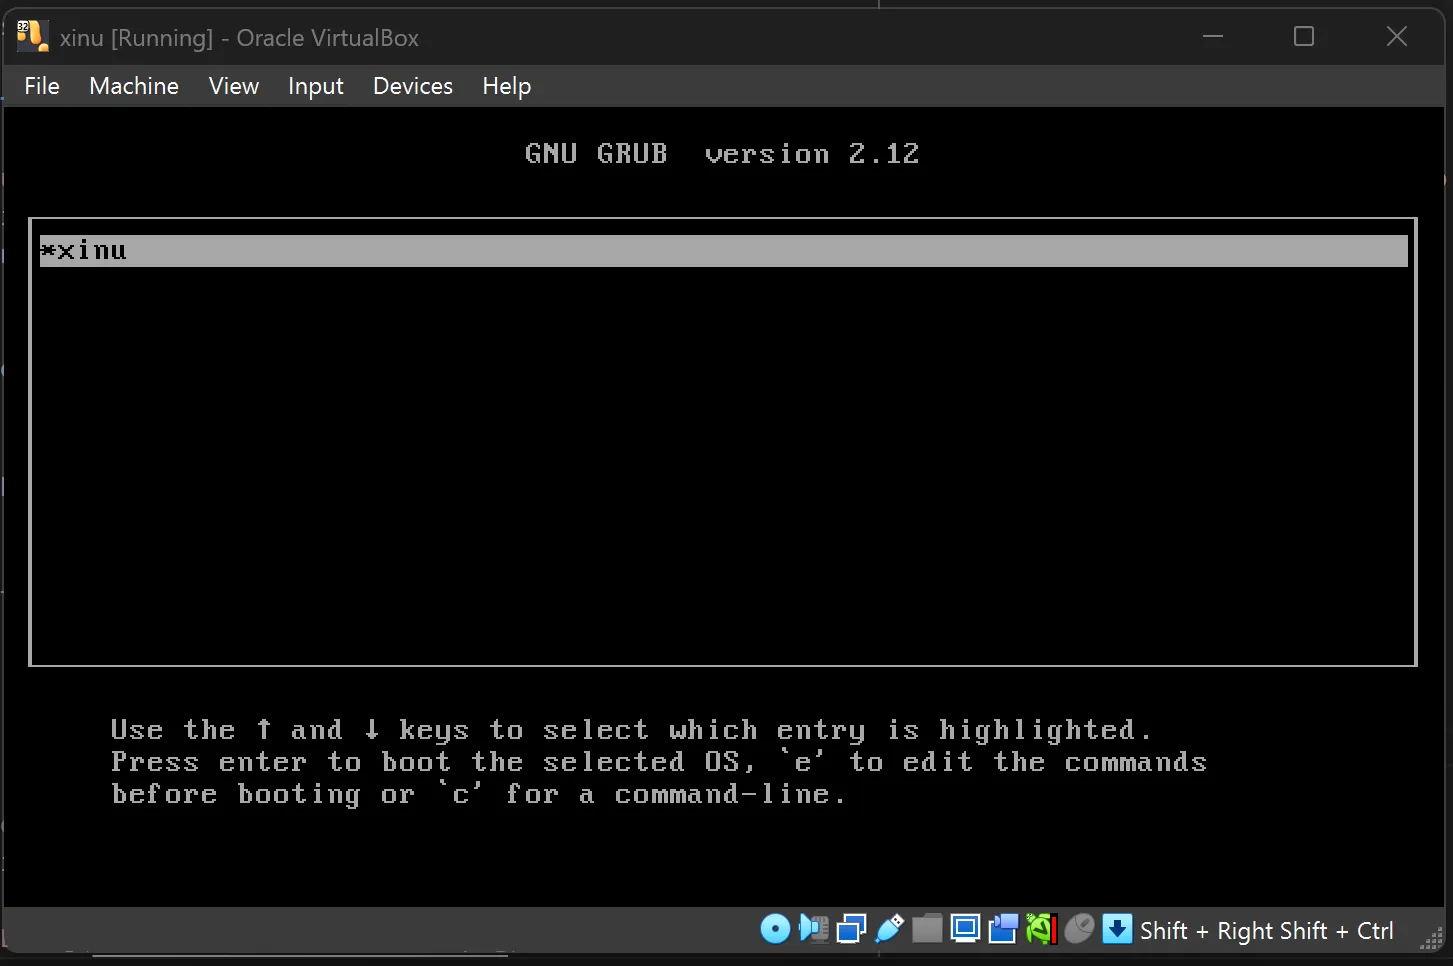
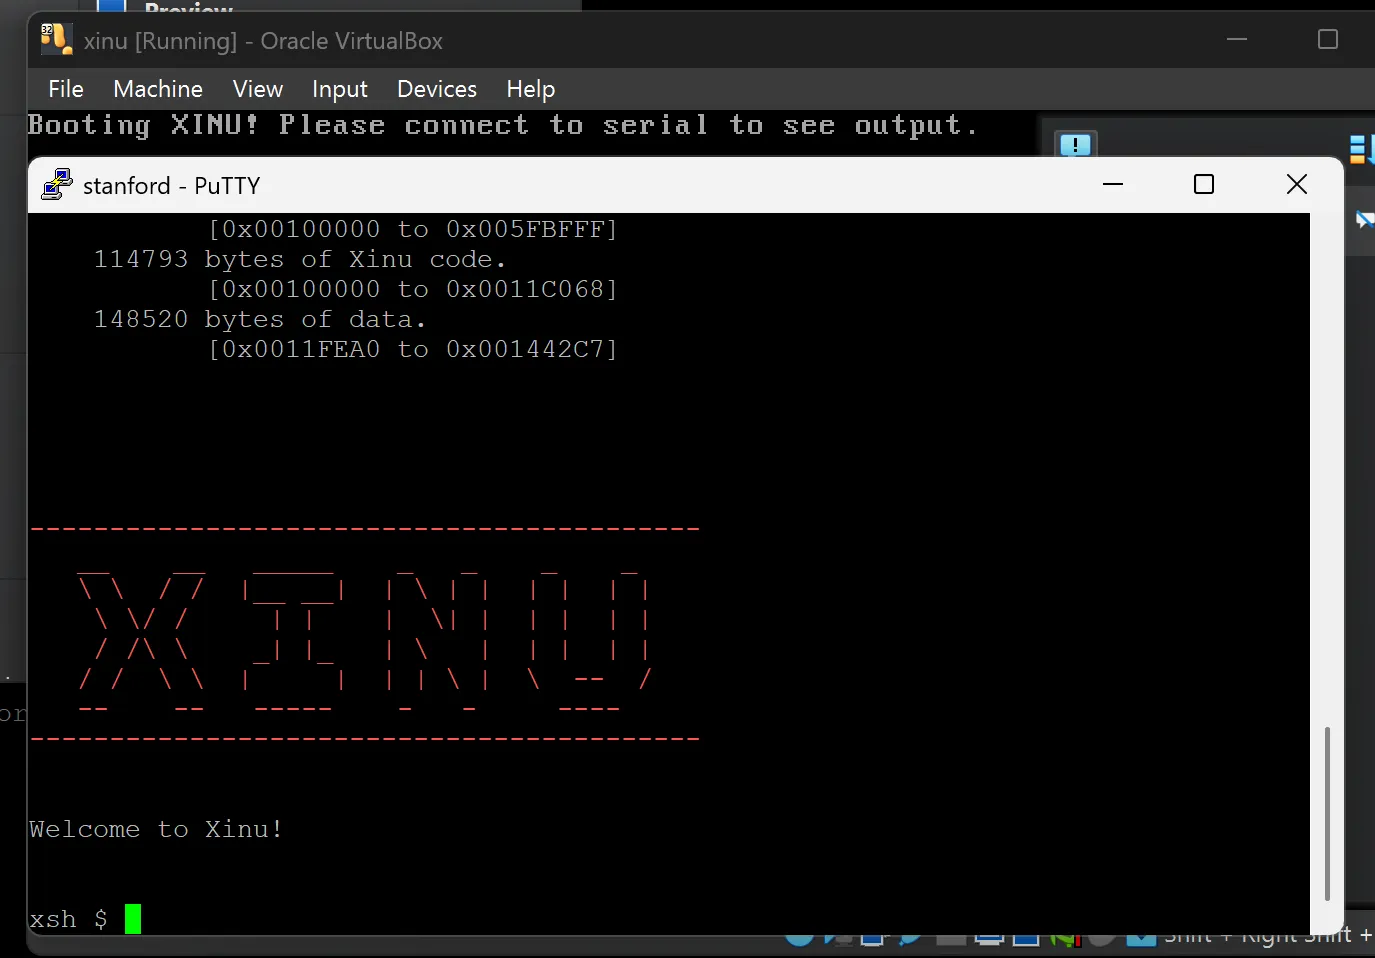
Connect to localhost:port with a Telnet program (such as PuTTY on Windows), substituting port with the number you chose earlier. Once the connection is established, press Enter in the VM window to boot XINU and you should see the printout from XINU in your Telnet session!
Update: Check out how to boot XINU on UTM (for Apple Silicon Macs) here!