A rant about cheap proprietary IP cameras (featuring Hej Home)
2025-04-18
A couple of months back, I was helping with cleaning out a relative’s closet when we came across this cheap-looking indoor IP camera from a company named Hej Home (헤이홈). The relative didn’t need it or want it, so I thought it might be fun to figure out how it ticks, and potentially have it set up as a local-only IP camera.
Before I get your hopes up too much, I didn’t really succeed in the latter half. This blog post documents my attempted journey on getting this camera to work for me, and a rant on all this garbage, crap IoT devices with no local access options, contributing to the e-waste epidemic everywhere.
Specifications
The unit I have is the “Smart Home Camera Pro (스마트 홈카메라 프로)”, model code GKW-MC055. It has one micro-USB port that carries over the power pins only, a reset hole, and a microSD card slot.
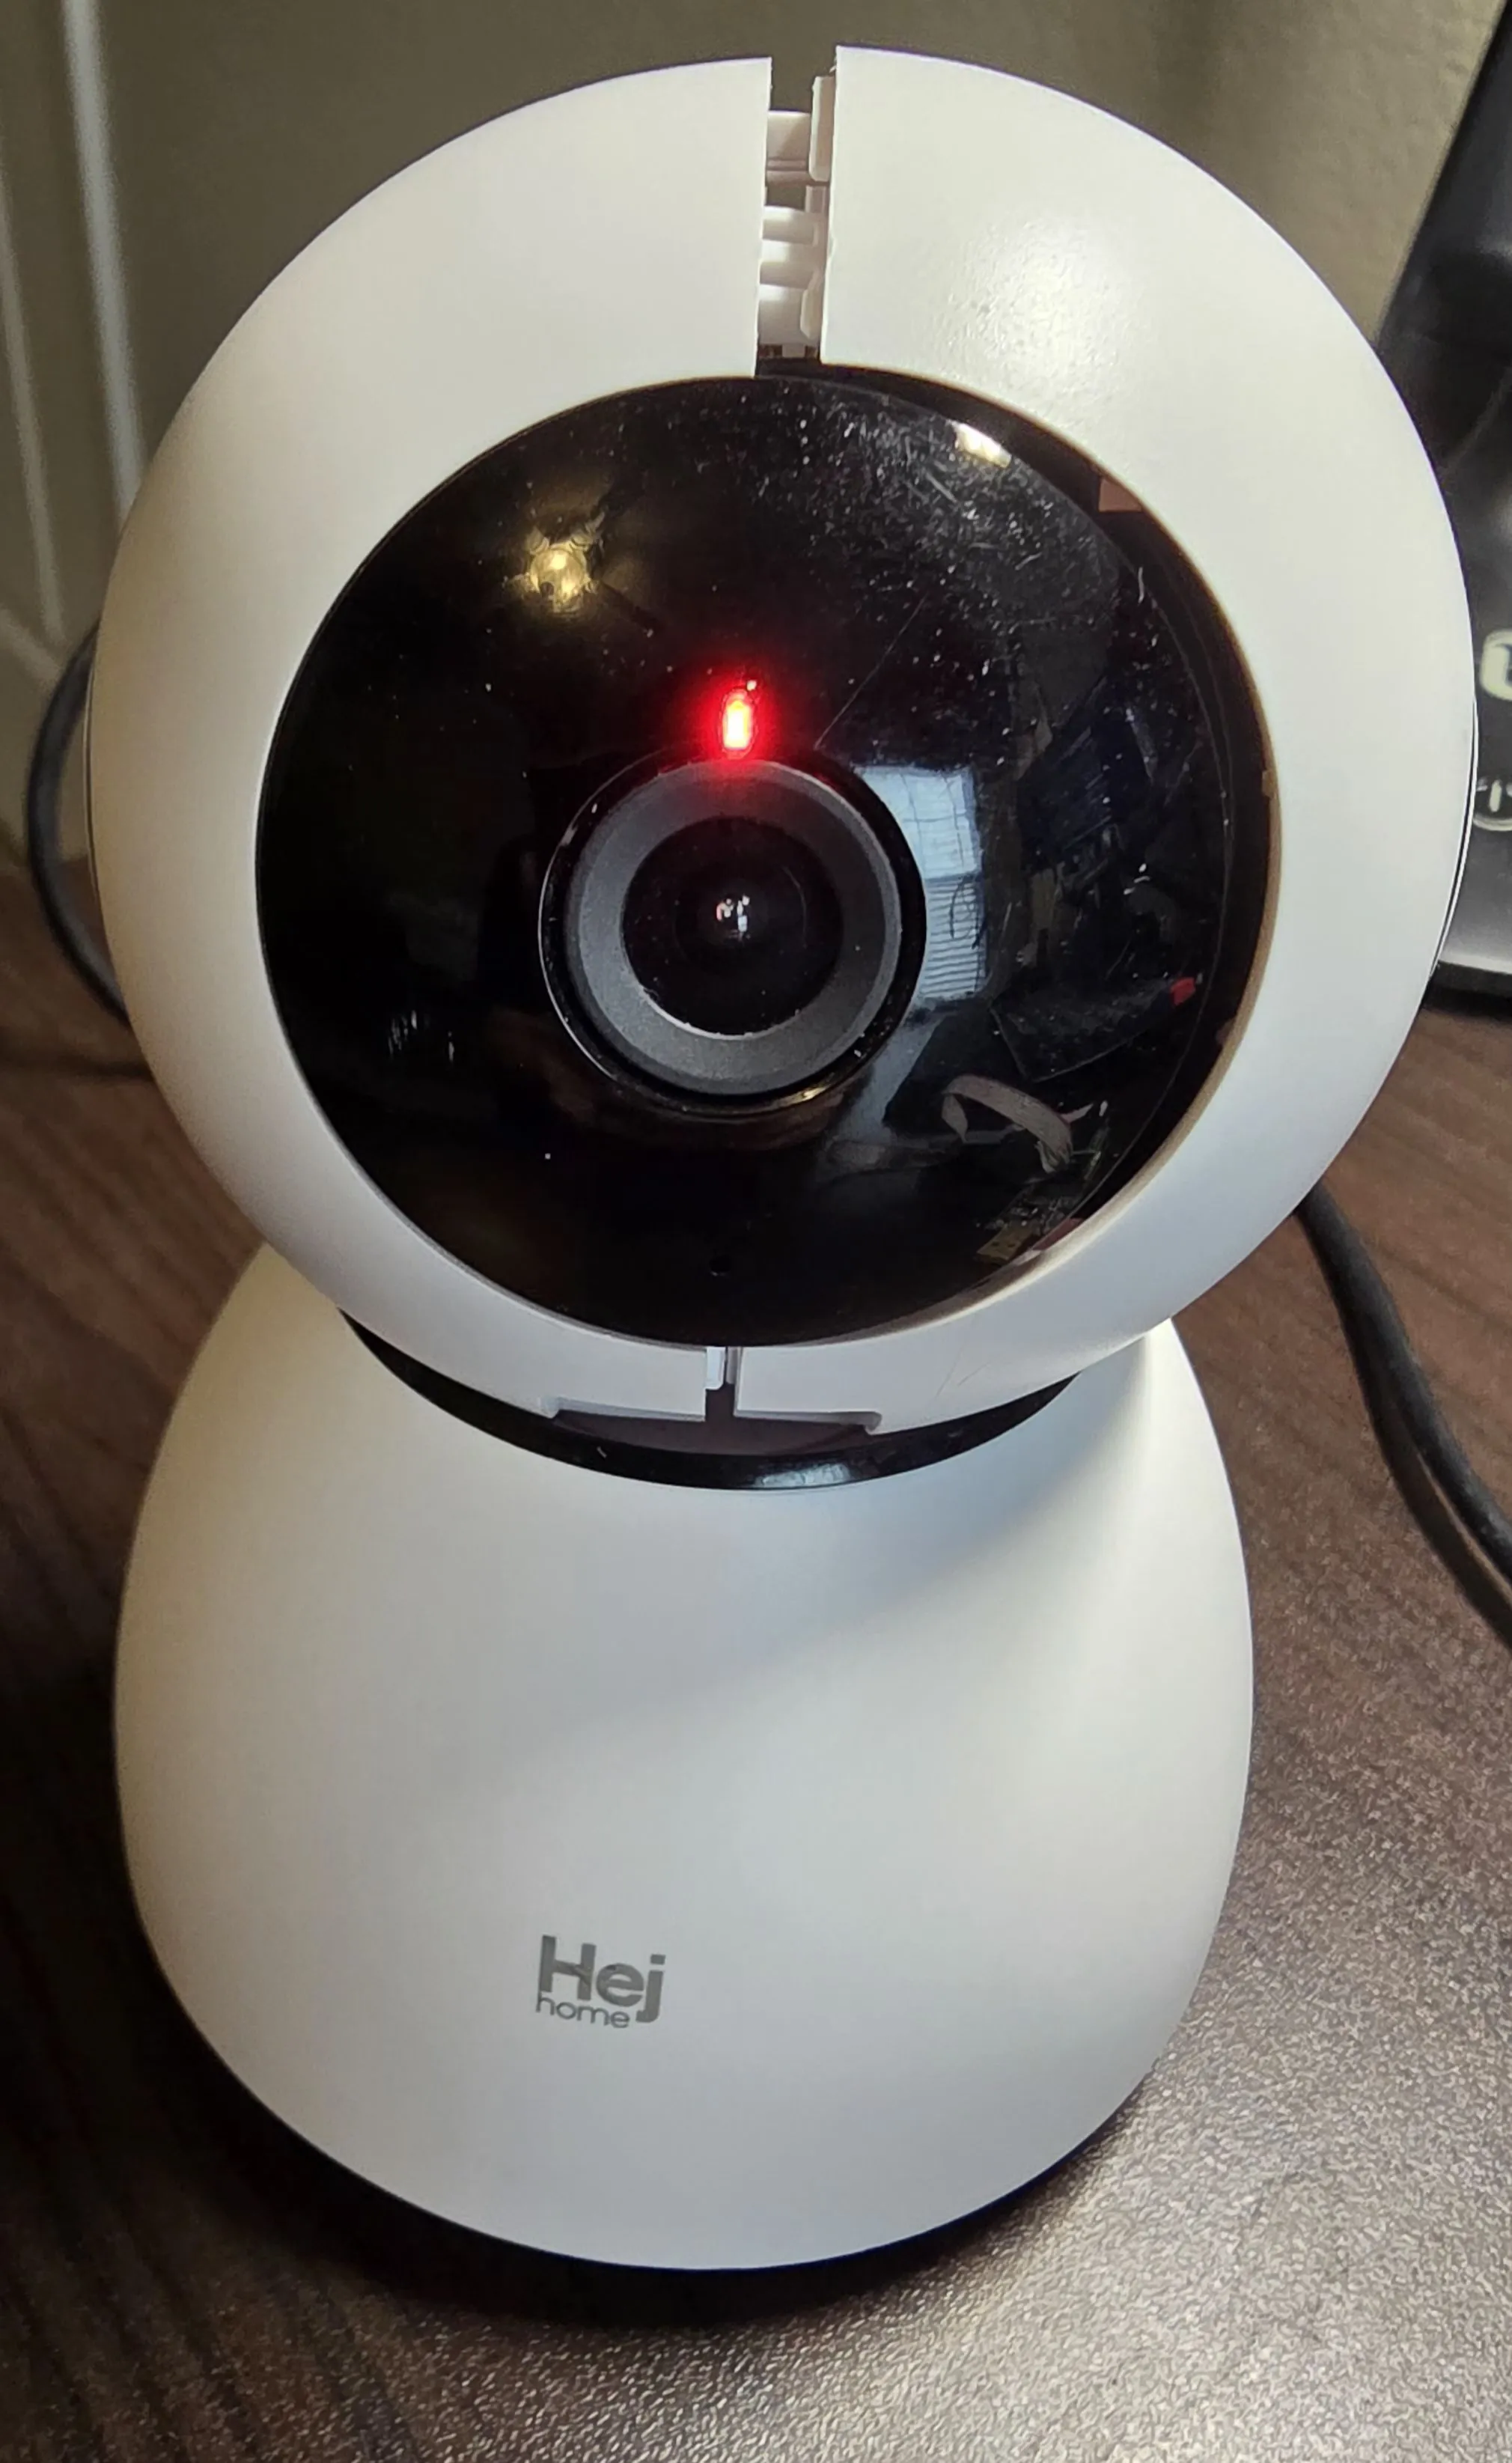
There is one tiny lens in front, with two LED indicators. One of the LED indicators is used for the status of the camera and lights up red when power is initially connected. Once the camera has finished initializing, the LED turns blue. The other indicator light denotes whether the camera is in night-vision mode. In the night-vision mode, an array of IR LEDs on the perimeter ring of the lens turn on to illuminate the area.
The camera also has a speaker and a mic for bidirectional communication via the app.
Speaking of the app, let’s try setting it up!
Setting up the camera on the official app
As always, the best place to start is the official manufacturer app, so I downloaded it and it asked me to set up an account. Fine, I guess. I set up the account and confirmed that I could actually see myself in the camera stream.
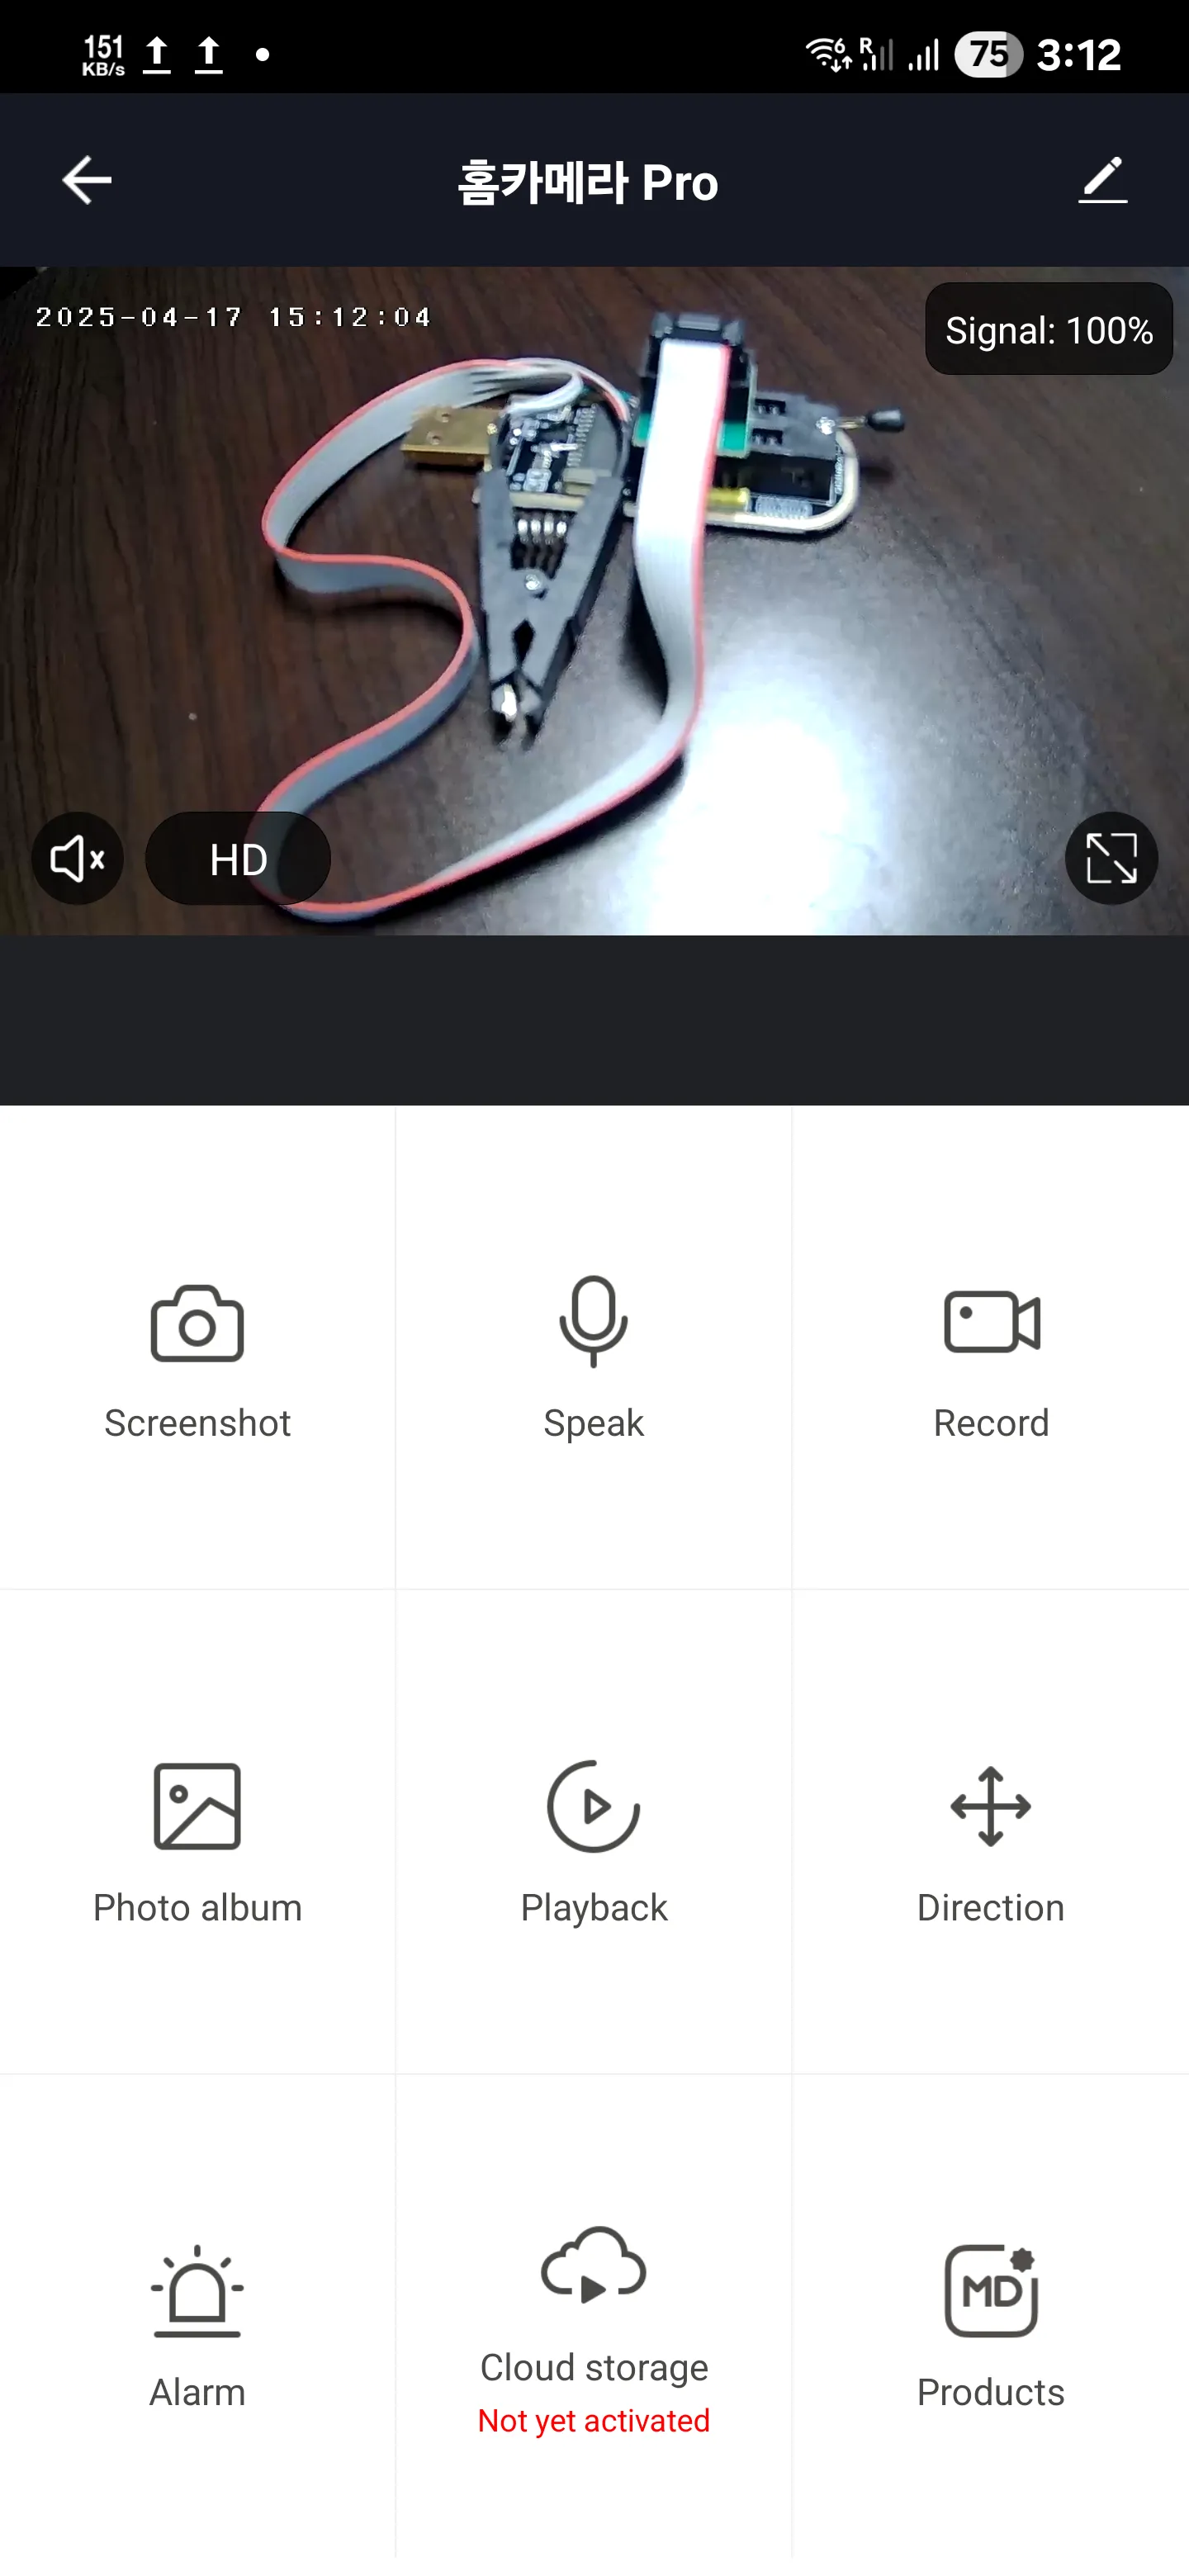
I then trawled through the settings menu, looking for any options to enable local access via RTSP or ONVIF. Unfortunately, no such setting existed. Looking through the FAQ section yielded no results.
Port-scanning the IP camera
Perhaps the local access ports are already open? I thought.
Time to port-scan this camera!
$ nmap 192.168.8.123
Starting Nmap 7.95 ( https://nmap.org ) at 2025-04-17 13:33 US Eastern Daylight Time
Nmap scan report for xxx.lan (192.168.8.123)
Host is up (0.022s latency).
Not shown: 999 closed tcp ports (reset)
PORT     STATE SERVICE
6668/tcp open  irc
MAC Address: B4:FB:E3:XX:XX:XX (AltoBeam (China))

Nmap done: 1 IP address (1 host up) scanned in 2.28 seconds
That was strange. There was only one port open, and I was pretty sure the camera didn’t have an IRC server running. I tried a more comprehensive scan, but it yielded the exact same result:
$ nmap -sS -p- 192.168.8.123
Starting Nmap 7.95 ( https://nmap.org ) at 2025-04-17 13:35 US Eastern Daylight Time
Nmap scan report for xxx.lan (192.168.8.123)
Host is up (0.019s latency).
Not shown: 65534 closed tcp ports (reset)
PORT     STATE SERVICE
6668/tcp open  irc
MAC Address: B4:FB:E3:XX:XX:XX (AltoBeam (China))

Nmap done: 1 IP address (1 host up) scanned in 28.72 seconds
Looking online, port 6668 seemed to be used by IoT devices that were based on the Tuya SDK, which was this company that specialized in licensing out its IoT platform for other companies to rebrand and re-sell. Hej Home seemed to be one of their clients, which explained why they were able to churn out so many IoT devices on their store.
But that’s not going to help me here. I looked up if there was a way to enable ONVIF with the underlying Tuya SDK and found this page. It seemed like enabling ONVIF was a simple configuration swap, so I sent off an email to the company behind Hej Home and asked if they would please consider enabling this. (It would cost them literally nothing to do this — it’s a config change and as far as I know Tuya won’t charge them extra for it or whatever.) Sadly, I’ve yet to hear back from them after emailing them on March 25.
So that’s out. What’s next?
Disassembling the camera
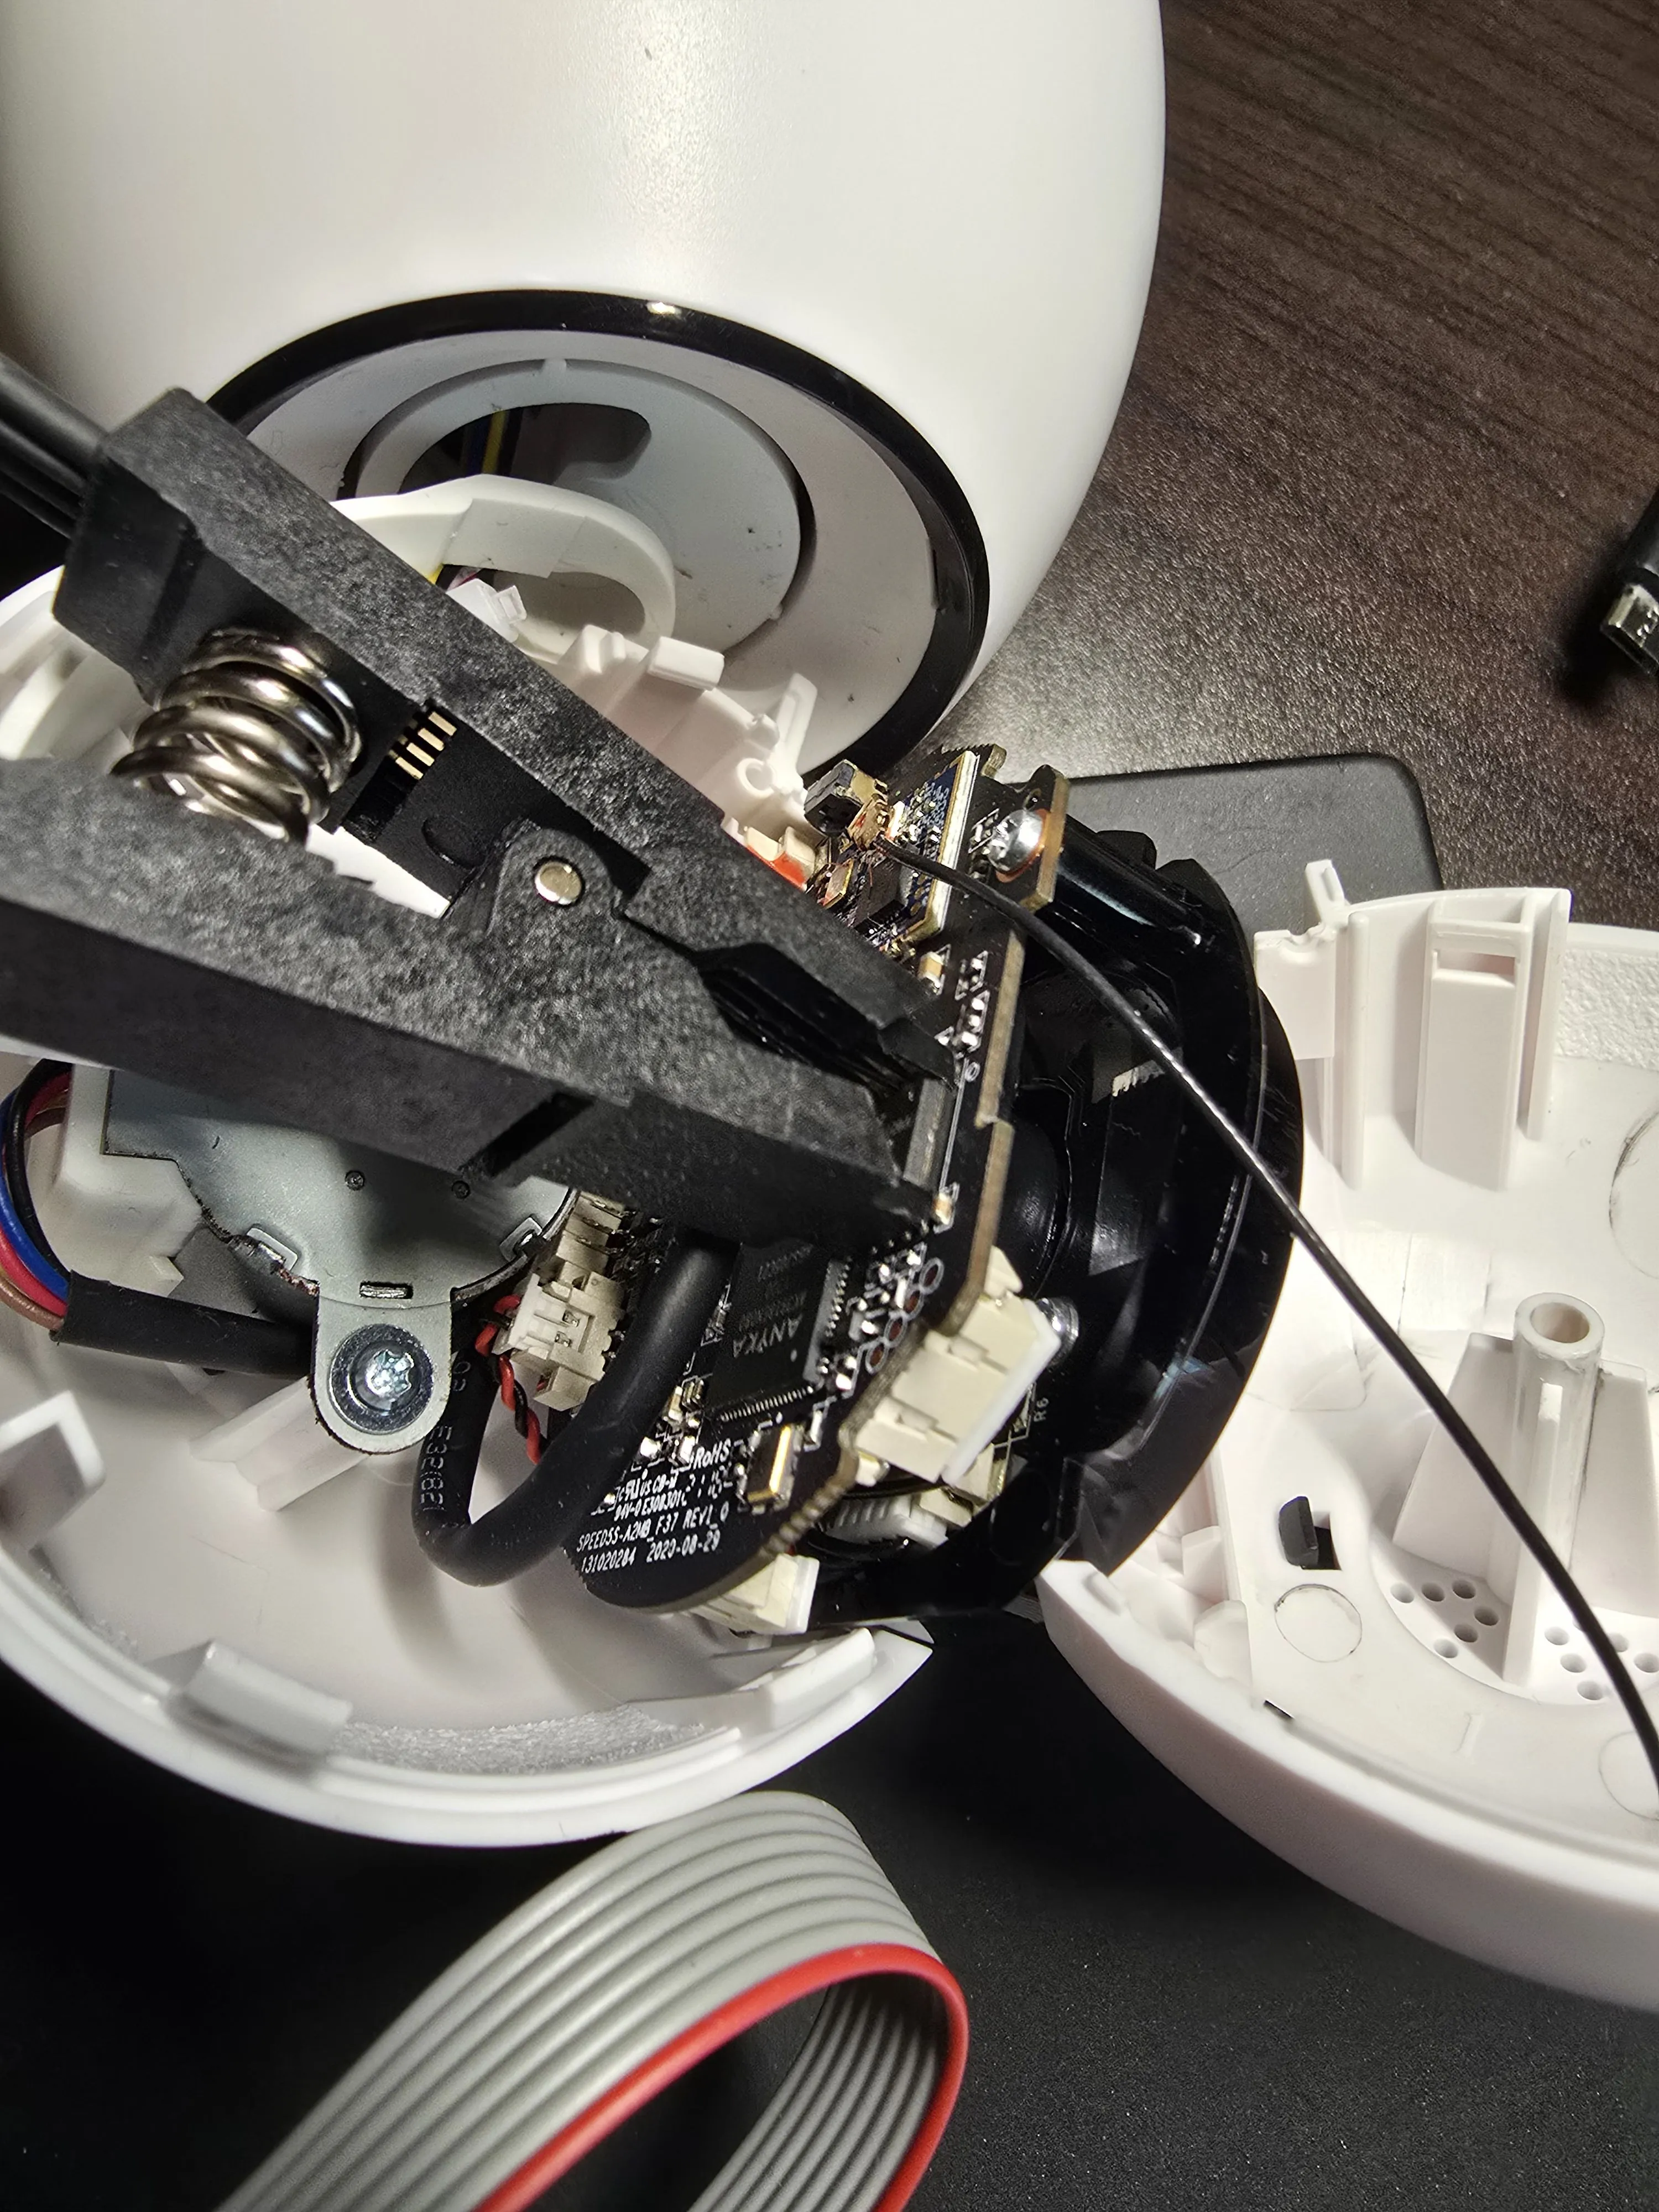
I decided to disassemble the camera and perhaps dump the firmware from the flash chip inside to see if I could glean any more clues from it. I made a false start trying to get into the camera from the bottom half — that only yielded access to the microUSB port, which was good if I ever wanted to transplant a USB-C port in there, since I only needed to solder on the power wires. Unfortunately, the brain and major parts of the camera were not inside the lower half like I assumed it would, and if I had been any less gentle with it I probably would’ve broken the camera, ending this exploration right then and there.
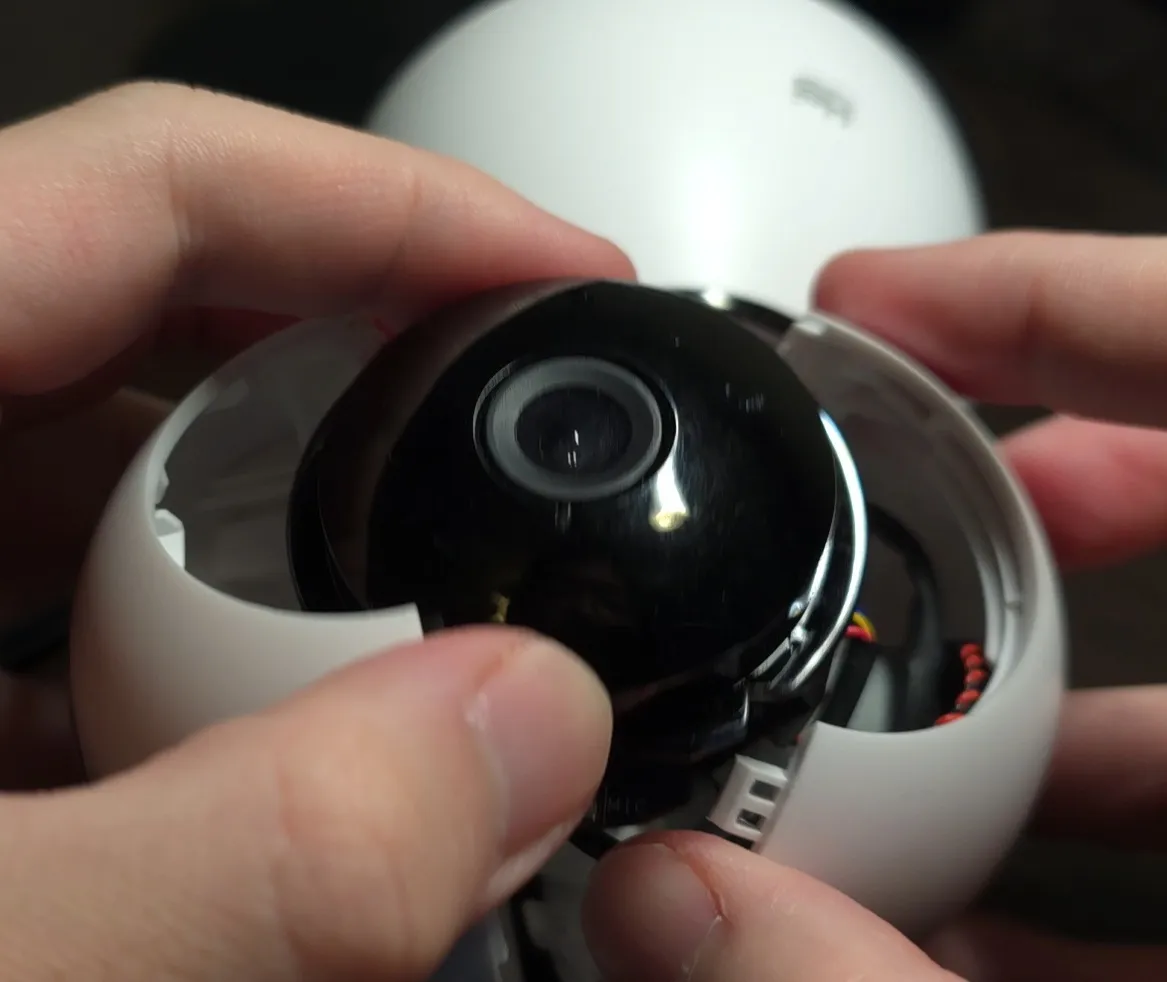
I eventually figured out that you had to separate the top half of the camera. More specifically, the globe shape split into two spherical halves, allowing me to extract the motherboard and the lens assembly, which was sandwiched together into one slim package. This small sandwich controlled the entirety of the camera, from the motors used to move it horizontally and vertically to camera control, SD card recording, and power input from the port downstairs.
Dumping the SPI flash chip
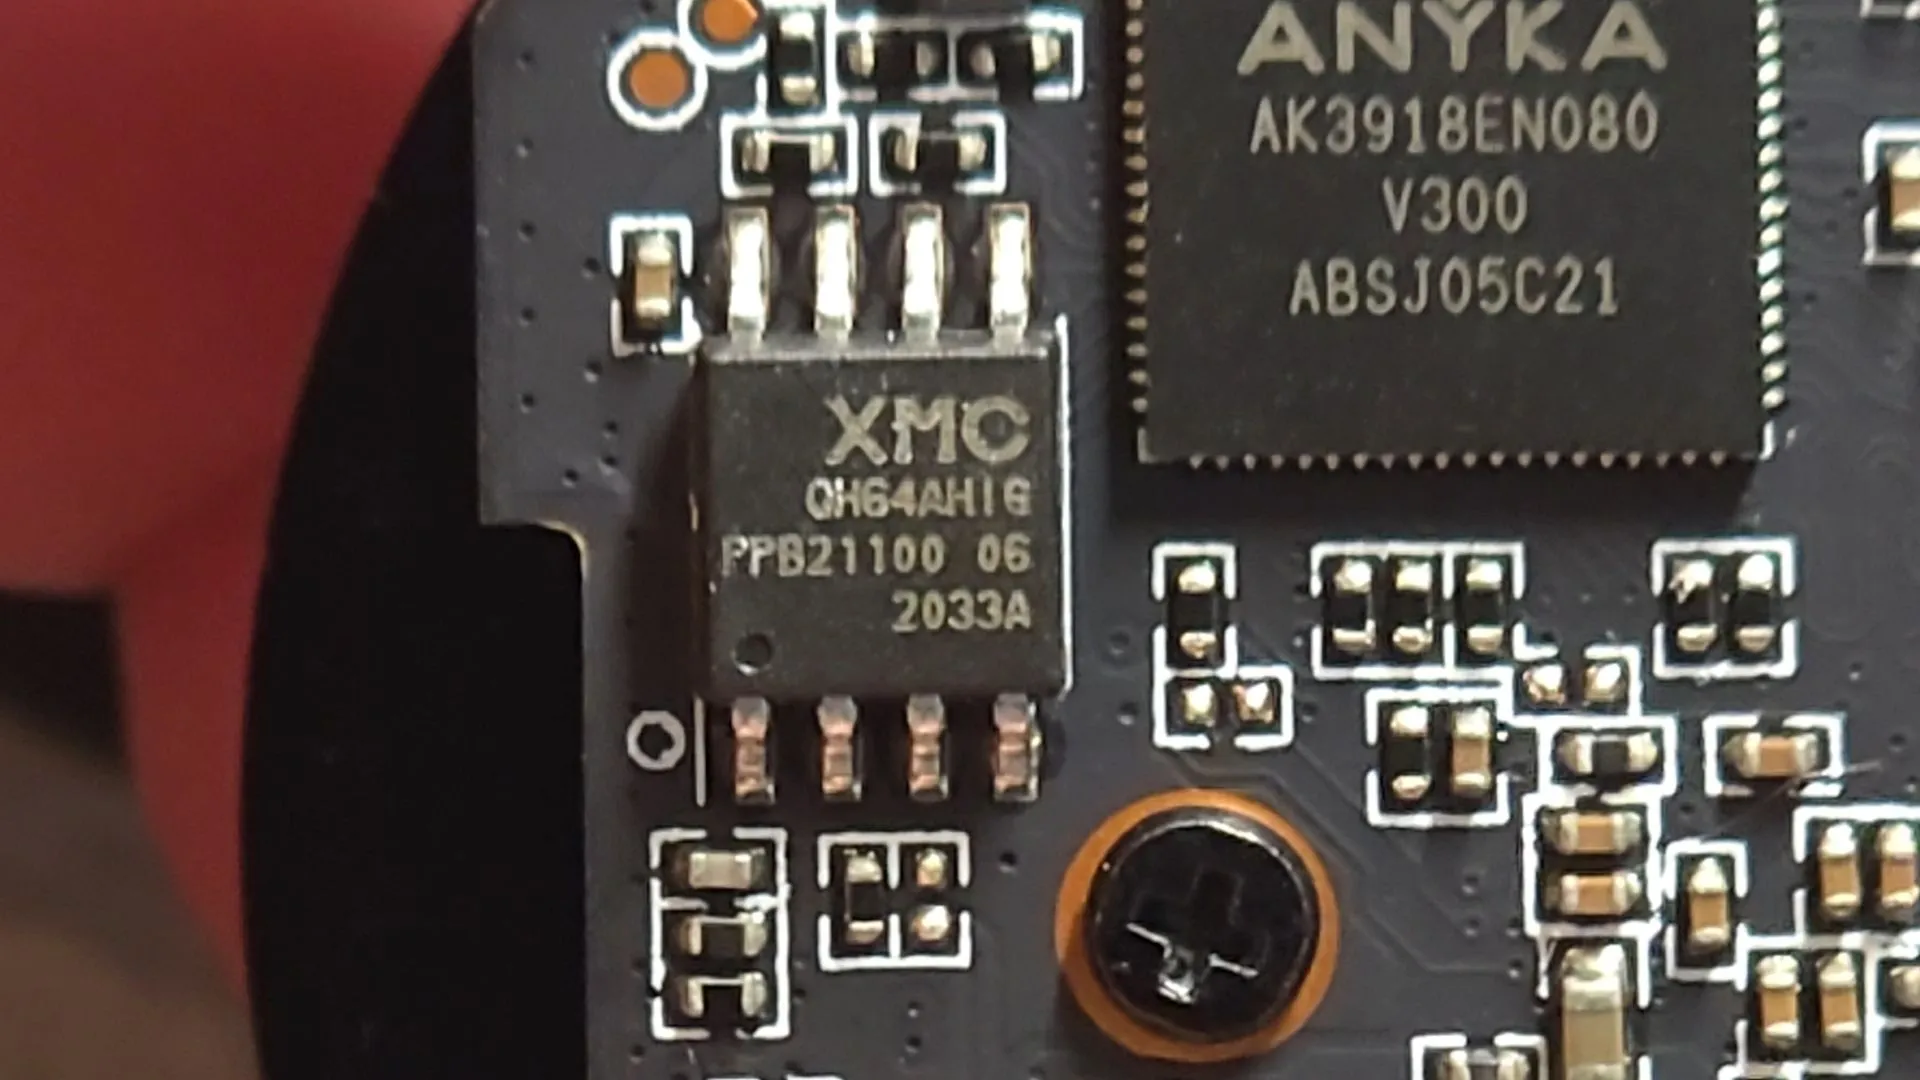
My attention immediately landed on the single marked flash chip, from XMC. The marking read XMCQH64AHIG, and I was pretty sure I could use flashrom to dump its contents. Unfortunately, I stumbled across this open issue on the flashrom GitHub, which had been open since July 2020.
I tried to figure out why the two linked pull requests had been closed, and discovered that the flashrom team didn’t use GitHub for development. Rather, they had their own Gerrit instance where they reviewed and merged patches. The associated pull request (actually, multiple of them) had been transferred to Gerrit but had been lost to time, and the original PRs had been closed.
So I tried my luck by submitting a patch myself, which actually got merged in March 29! So after 5 years, flashrom gained the ability to read and write from this chip.
Looking at the firmware dump
Now that the chip definition had been added, I used the flashrom development binary I compiled to rip the firmware from the board. I then used binwalk -Me cctv.bin to extract the contents and had a look around.
There was a file named tuya_config.json in one of the extracted folders that looked very promising. One of the config options caught my eye:
"onvif_enable": 0,What would happen if I just changed that to 1? I thought. So I fired up hexedit on a copy of the firmware dump, searched manually for 6F 6E 76 69 66 5F 65 6E 61 62 6C 65 (which was onvif_enable in hexadecimal), and replaced the value 30 (0) to 31 (1). I then flashed the firmware back onto the camera and connected it to power.
During startup, a startling chime came from the camera which I had never heard before. I got nervous and excited for a moment, thinking that ONVIF had finally been enabled. Unfortunately, nmap showed that there were no new open ports on the camera.
I then looked into whether I could flash a completely new firmware image, overwriting whatever proprietary crap that Hej Home and Tuya had on there.
Looking for open-source options
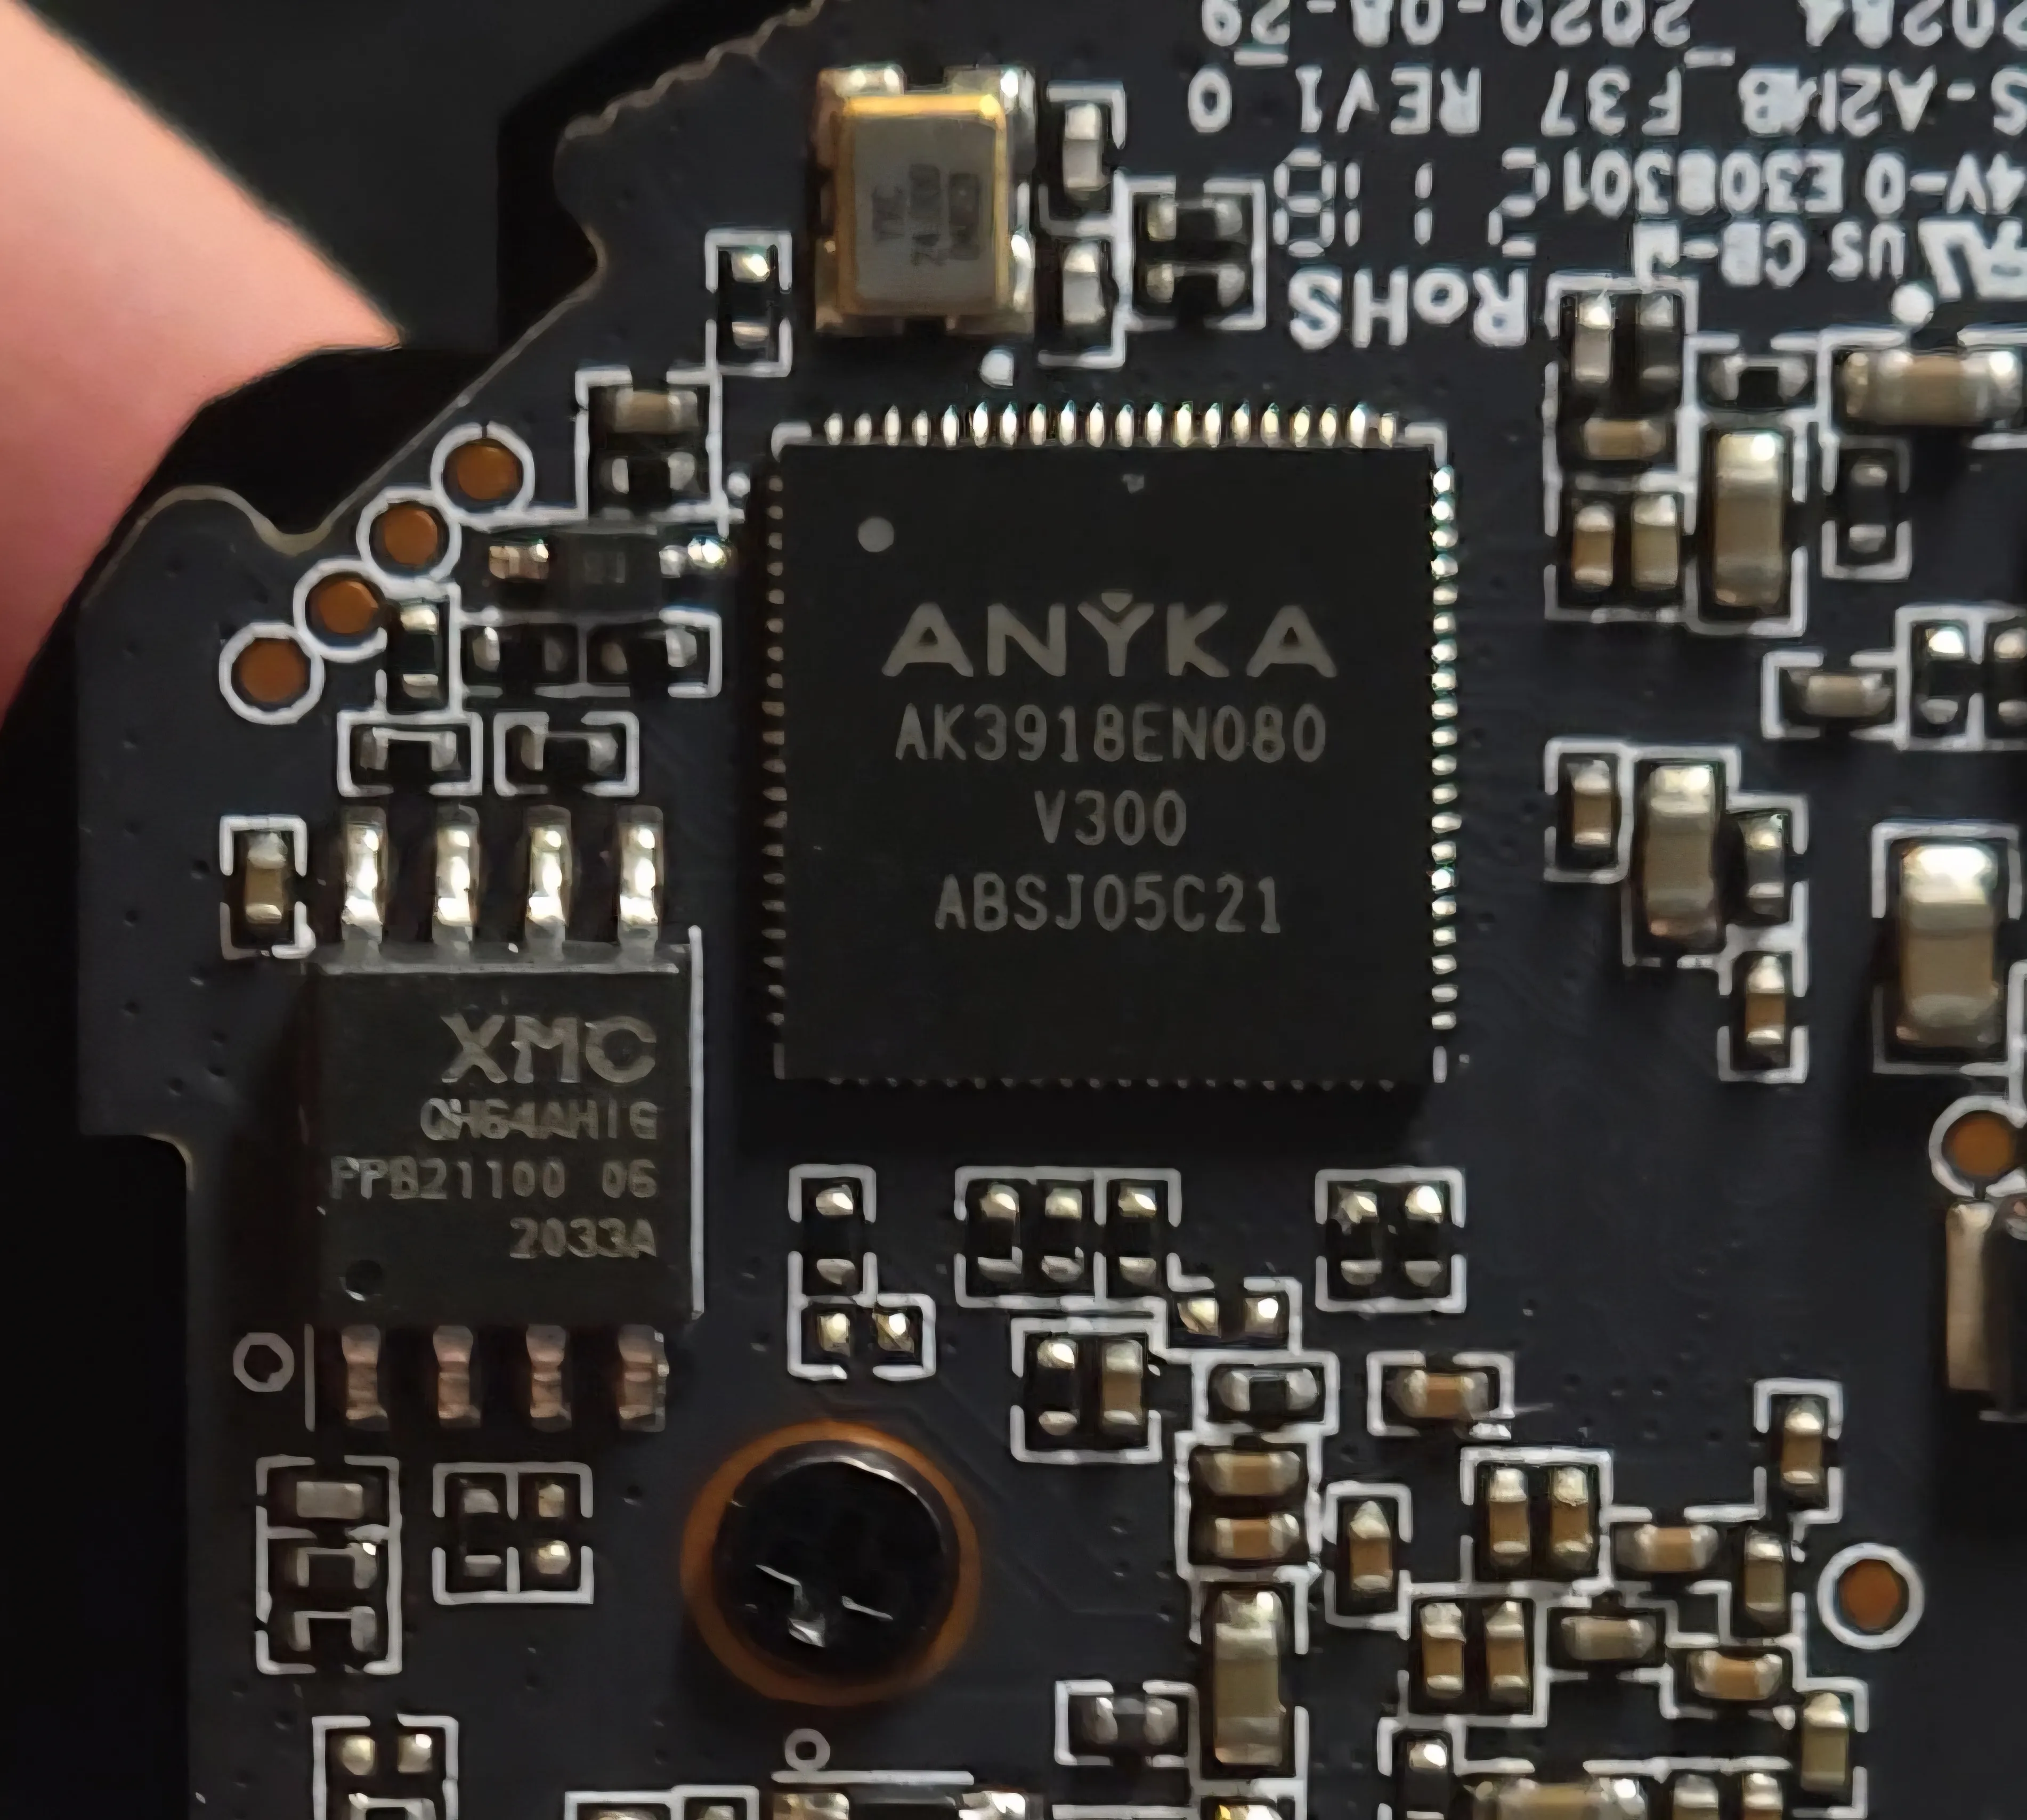
From my previous expedition, I knew that the SoC of the camera was this chip marked AK3918 from this company named “Anyka”. Turns out, this was some Chinese company producing an all-in-one SoC for IoT camera makers.
While there was a datasheet available, the drivers and hardware definition had never been mainlined into the Linux kernel, probably because no Chinese company has the time to do that. Actually, they didn’t even release the kernel sources despite shipping a variant of the Linux kernel, but we all know that GPL is merely a suggestion to these hardware OEMs that they never take seriously.
There were some repositories attempting to reverse engineer cameras built upon this SoC, but I quickly realized that there were different firmware revisions to this SoC as well, and most of the repos that I found targeted the AK3918v200 revision, while my camera had the AK3918v300 one. Even if I could somehow tweak things to get the v200 repos working on the v300 one, the repositories only had basic scripts available, and it was not clear whether I would be able to even set up RTSP or ONVIF with those open source options.
Cutting my losses and moving on
Unfortunately, this is where I choose to stop. It’s been great getting my hands dirty disassembling this camera, dumping firmware, and contributing to the flashrom project, but going any further is just not worth my time.
For reference, a camera on Amazon that supports ONVIF is only around $25. I can buy it, hook it up, and connect it to Home Assistant with much less hassle than what I just went through. I don’t know how many hours, days, or even weeks it’ll take before I get some semblance of local access working on the original godforsaken camera, but I do know for sure that it’ll be worth much more than $25.
But forget about this alternative for a second. It’s ridiculous that a camera that is capable of being streamed to a local server without Internet access just can’t do that, because of some configuration change that’s locked away in a proprietary SDK. Without it, this camera becomes worthless to me, and probably to a vast majority of others as well. Nobody would be comfortable streaming the inside of their home to some server farm in China somewhere… or at least nobody should be comfortable in doing so.
And yet Tuya and all the client companies that depend on Tuya use this approach because it’s so easy to set up. They can pump out all this e-waste IoT garbage and get the tech illiterate audience to buy them and set them up, since they value the ease of use in not having to deal with setting up port forwarding and a NVR or whatever. But in doing so, they don’t realize that they’re giving a 3rd-party access to their living room space, or their baby crib or whatever.
So please, if someone you know is thinking about setting up cameras in their home (or any IoT device, really), always stress the importance of local-only access and why having devices phone home via the Internet is not a good idea, even if it is convenient. Home Assistant is extremely easy to set up, and now that they sell ready-made kits to set it up in minutes, there’s no real excuse in not using such a solution.