[Edit: Do NOT use] Setting up Time Machine on any SMB server (feat. automount)
January 8, 2023
Warning: this page is older than 365 days. The content may be out-of-date.
Update at the end of this blog post!
Time Machine on macOS does a lot of things just right. It’s incremental, so you save disk space on the destination. It runs seamlessly in the background, and if you enable Power Nap it will run even when the lid is closed.
What it is absolutely terrible at is backing up to anything other than a directly-attached storage device.
Want to back up to a remote storage? Great, choose from one of the following options:
Buy a readymade device from Apple that does this for youNope! That was the AirPort lineup and Apple discontinued them centuries ago.Back up to a NAS that supports AFPNope! AFP is also gone. If your NAS advertised Time Machine support based on AFP, you have a terribly outdated NAS and should get rid of it yesterday.- Buy a NAS that has SMB and hope that it supports the “Apple extensions” (we’ll get to that in a second) so that Time Machine will actually work. (And chuck the NAS out the window when you discover that it won’t work reliably because the NAS manufacturer did a terrible job configuring Samba.)
- Spend days and days wrestling with the configuration of your DIY NAS in order to get it to work. I tried this. This is not pretty. You will regret this route. (Oh, and it involves the “Apple extensions” I talked about earlier. What are those? Coming up soon!)
- Throw it all out and work around it on your Mac.
Okay, we’ll start from the second one and work our way down.
AFP?
AFP stands for Apple Filing Protocol, and I won’t get into it much because it is older than dirt. It’s also gone in the latest versions of macOS, by the way, so you won’t be able to use it for Time Machine, even if you really wanted to force it.
“Apple extensions?”
Apple just had to tack on something to the SMB protocol developed by Microsoft. So they added these “extensions” that make SMB servers work well on Apple products.
The open-source SMB project, Samba, attempts to implement these in the vfs_fruit module, but I’ve had instances where Time Machine would just NOT play nice, even when the module was enabled.
If Time Machine suddenly stopped working on your “Time Machine-compatible” NAS one day, it’s probably because macOS is chucking a fit because it didn’t get the special vfs_fruit data that it likes, in just the right way it wants it.
DIY NAS?
So what if you have a DIY NAS, like something running unRAID and OpenMediaVault instead of Synology and QNAP, and attempt to build a Time Machine server off of it?
Well, a lot of headache. I tried setting up Time Machine with my unRAID NAS. While in theory it was supposed to work OOTB, the backup kept failing sporadically and family members reported the same as well. I spent weeks fiddling around with the configuration but to no avail. Sometimes, it would suddenly work without any issues, then stop working again the next hour, even when I hadn’t changed anything.
It was maddening and I don’t recommend anybody try this route.
The Mac workaround
So here is the method I settled on, and it has worked rather flawlessly for the past couple of days:
Make your Mac back up to an image stored on the SMB server.
So I’m going to show you the steps to achieve just that.
- Connect to your server.
- Open up Disk Utility and press Command-N to create a new image. Set the options:
- Name: “Time Machine”
- Size: Whatever you want, but I recommend making it bigger than your Mac’s drive space
- Format: “APFS”
- Encryption: “128-bit AES encryption (recommended)” (You will be prompted for a password)
- Partitions: “Single partition - GUID Partition Map”
- Image Format: “sparse bundle disk image”
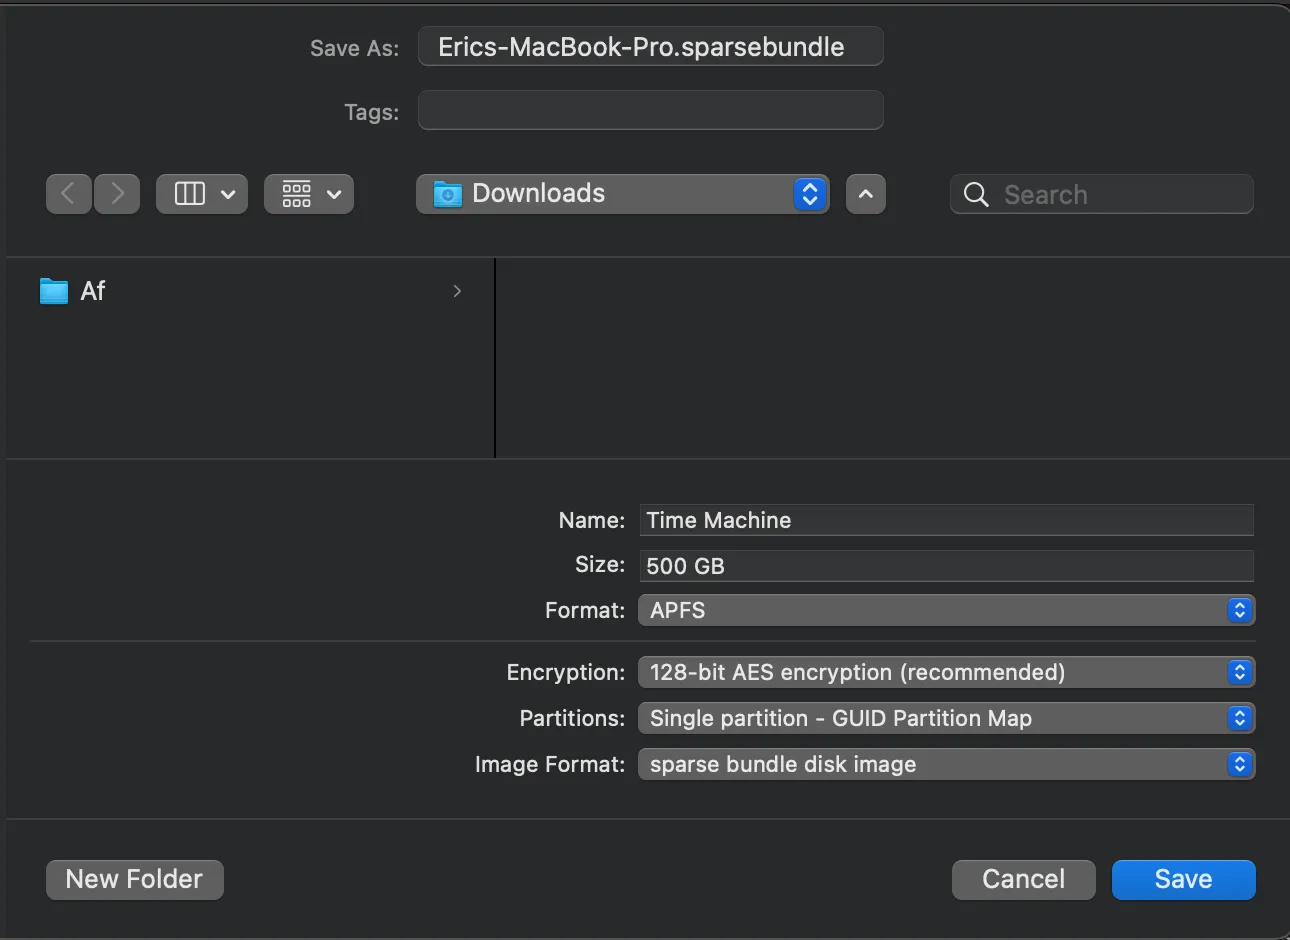
It is important that you save this locally, like in the “Downloads” folder! Attempting to save this directly to the server will result in the following error:
Operation failed with status 73: RPC version wrongYou can choose whatever you want for the image name (I’ll just call the sparse bundle an image for brevity), but I recommend setting it to the name of your Mac so that you can distinguish the images.
Once it is created, macOS will automatically mount it. Eject it, then move the file over to your server.
- Mount the image. Make sure to click on the checkbox that says “Remember password in my keychain”. This is important if you want to auto-mount the image later.
- Give the “Full Disk Access” permission to your terminal app of choice.
- In your terminal app, run:
sudo tmutil setdestination /Volumes/Time\ MachineMake sure to replace /Volumes/Time\ Machine with your actual volume name! If you’re unsure, delete it, then drag the volume (NOT the image) to the terminal window.
Once you run it and enter your password, the volume will be set as the Time Machine destination. Your desktop may flash a couple of times. This is normal.
- Set up automatic backups in Time Machine.
Note: in some cases, Time Machine may refuse to let you change the schedule to automatic. In this case, quit the “System Settings” app completely, then go back into the Time Machine settings page.
Select “Options”, and change “Back up frequency” to “Automatically every hour”:
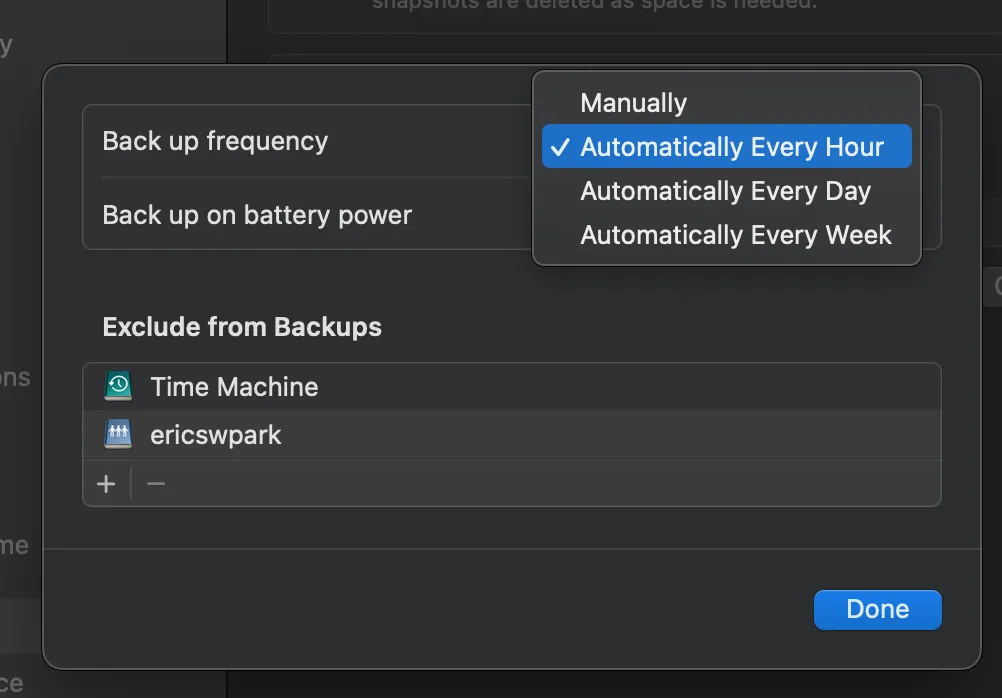
You should probably not turn on “Back up on battery power” unless you really need hourly backups, no matter what.
Note: If the setting keeps reverting back to “Manually”, try step 7 first, then come back here.
- Run a manual backup.
Go into the Time Machine settings, right click on the destination, and select “Back up to ‘Time Machine’ now”:
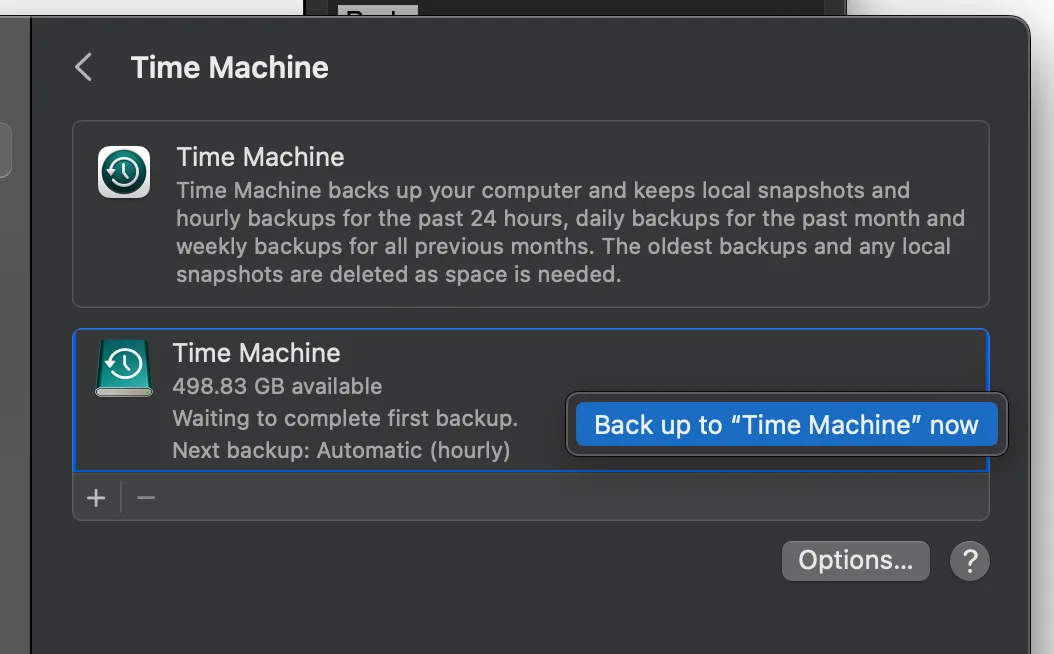
If your disk showed up as “0 KB available”, this step should fix that.
- (optional, but recommended) Set up auto-mount.
I ended up using a paid app called “AutoMounter” on the App Store, but I am pretty sure that there are other options out there.
Add your SMB share to the app, then add this script to run whenever the share is mounted:
#!/usr/bin/env bash

# Eject previous Time Machine volume if it exists
diskutil eject /Volumes/Time\ Machine

# Sleep 10 seconds because macOS is janky
sleep 10

# Open disk image file
open /Volumes/smb-share/TimeMachine/Erics-MacBook-Pro.sparsebundle
Make sure to replace the paths with your own.
Now, Time Machine will back up whenever it sees the volume mounted, and AutoMounter will mount the volume whenever the SMB share is available!
Conclusion
I can’t believe using Time Machine is this user-unfriendly. Ideally there should be a button in the Time Machine settings that does all of the above for us. But for now, this will have to do.
Update (2023-01-26)
Don’t use this method. When Time Machine backs up to a sparse bundle hosted on a network share, it thrashes the network quite heavily, slowing everything down. I think it has something to do with packages actually being directories containing lots and lots of small files. Because Time Machine can’t get the metadata streamed through with Apple’s SMB extensions, it resorts to fetching the entire file, which slows things down.
At this point, I’ve given up completely with network-based Time Machine backups. Use an external drive: it’s idiot-proof and easy to restore from.