Repasting my MacBook Pro
2020-05-18
This is going to be a short article, because I forgot to record anything or take photos. I was going to initially disassemble the entire thing, then reassemble it, then start recording again as I went through the process. In reality, I only disassembled it once and vowed myself to never do it again because it is that complicated.
There are at least 4 different screw types, not to mention the countless ribbon cables scattered here and there that make disassembly a complete nightmare. Also, Apple had the smartest idea of putting the retaining screws of the heatsink on the other side of the logic board, which means re-pasting your laptop requires you to disassemble the entire thing.
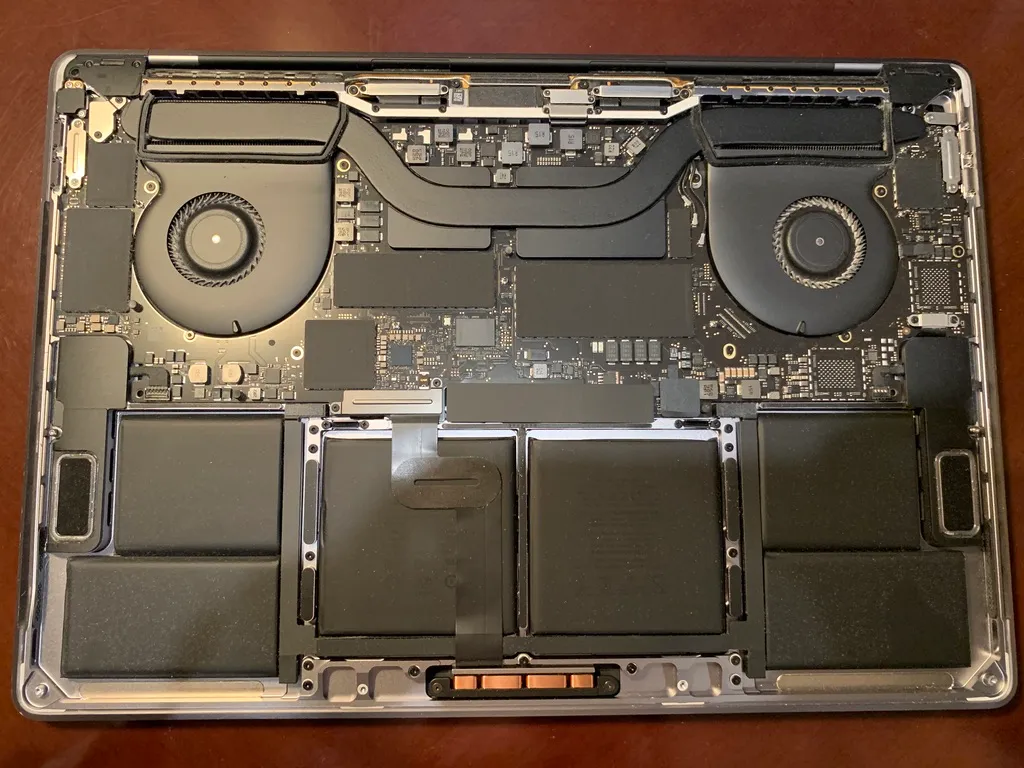
So, this is the only photo I managed to take (enjoy!):

Gotta love that overboard Apple engineering 😀
But I think the trouble was worth it in the end. The stock thermal paste was all dried up and nasty, resulting in the laptop idling at around 49 degrees Celsius. Now, it idles at around 40-44 degrees Celsius, which means I scored about 5 degrees Celsius out of the entire ordeal. If you want that improvement, then yeah, sure. (Just remember, I don’t assume any responsibility for your actions.)
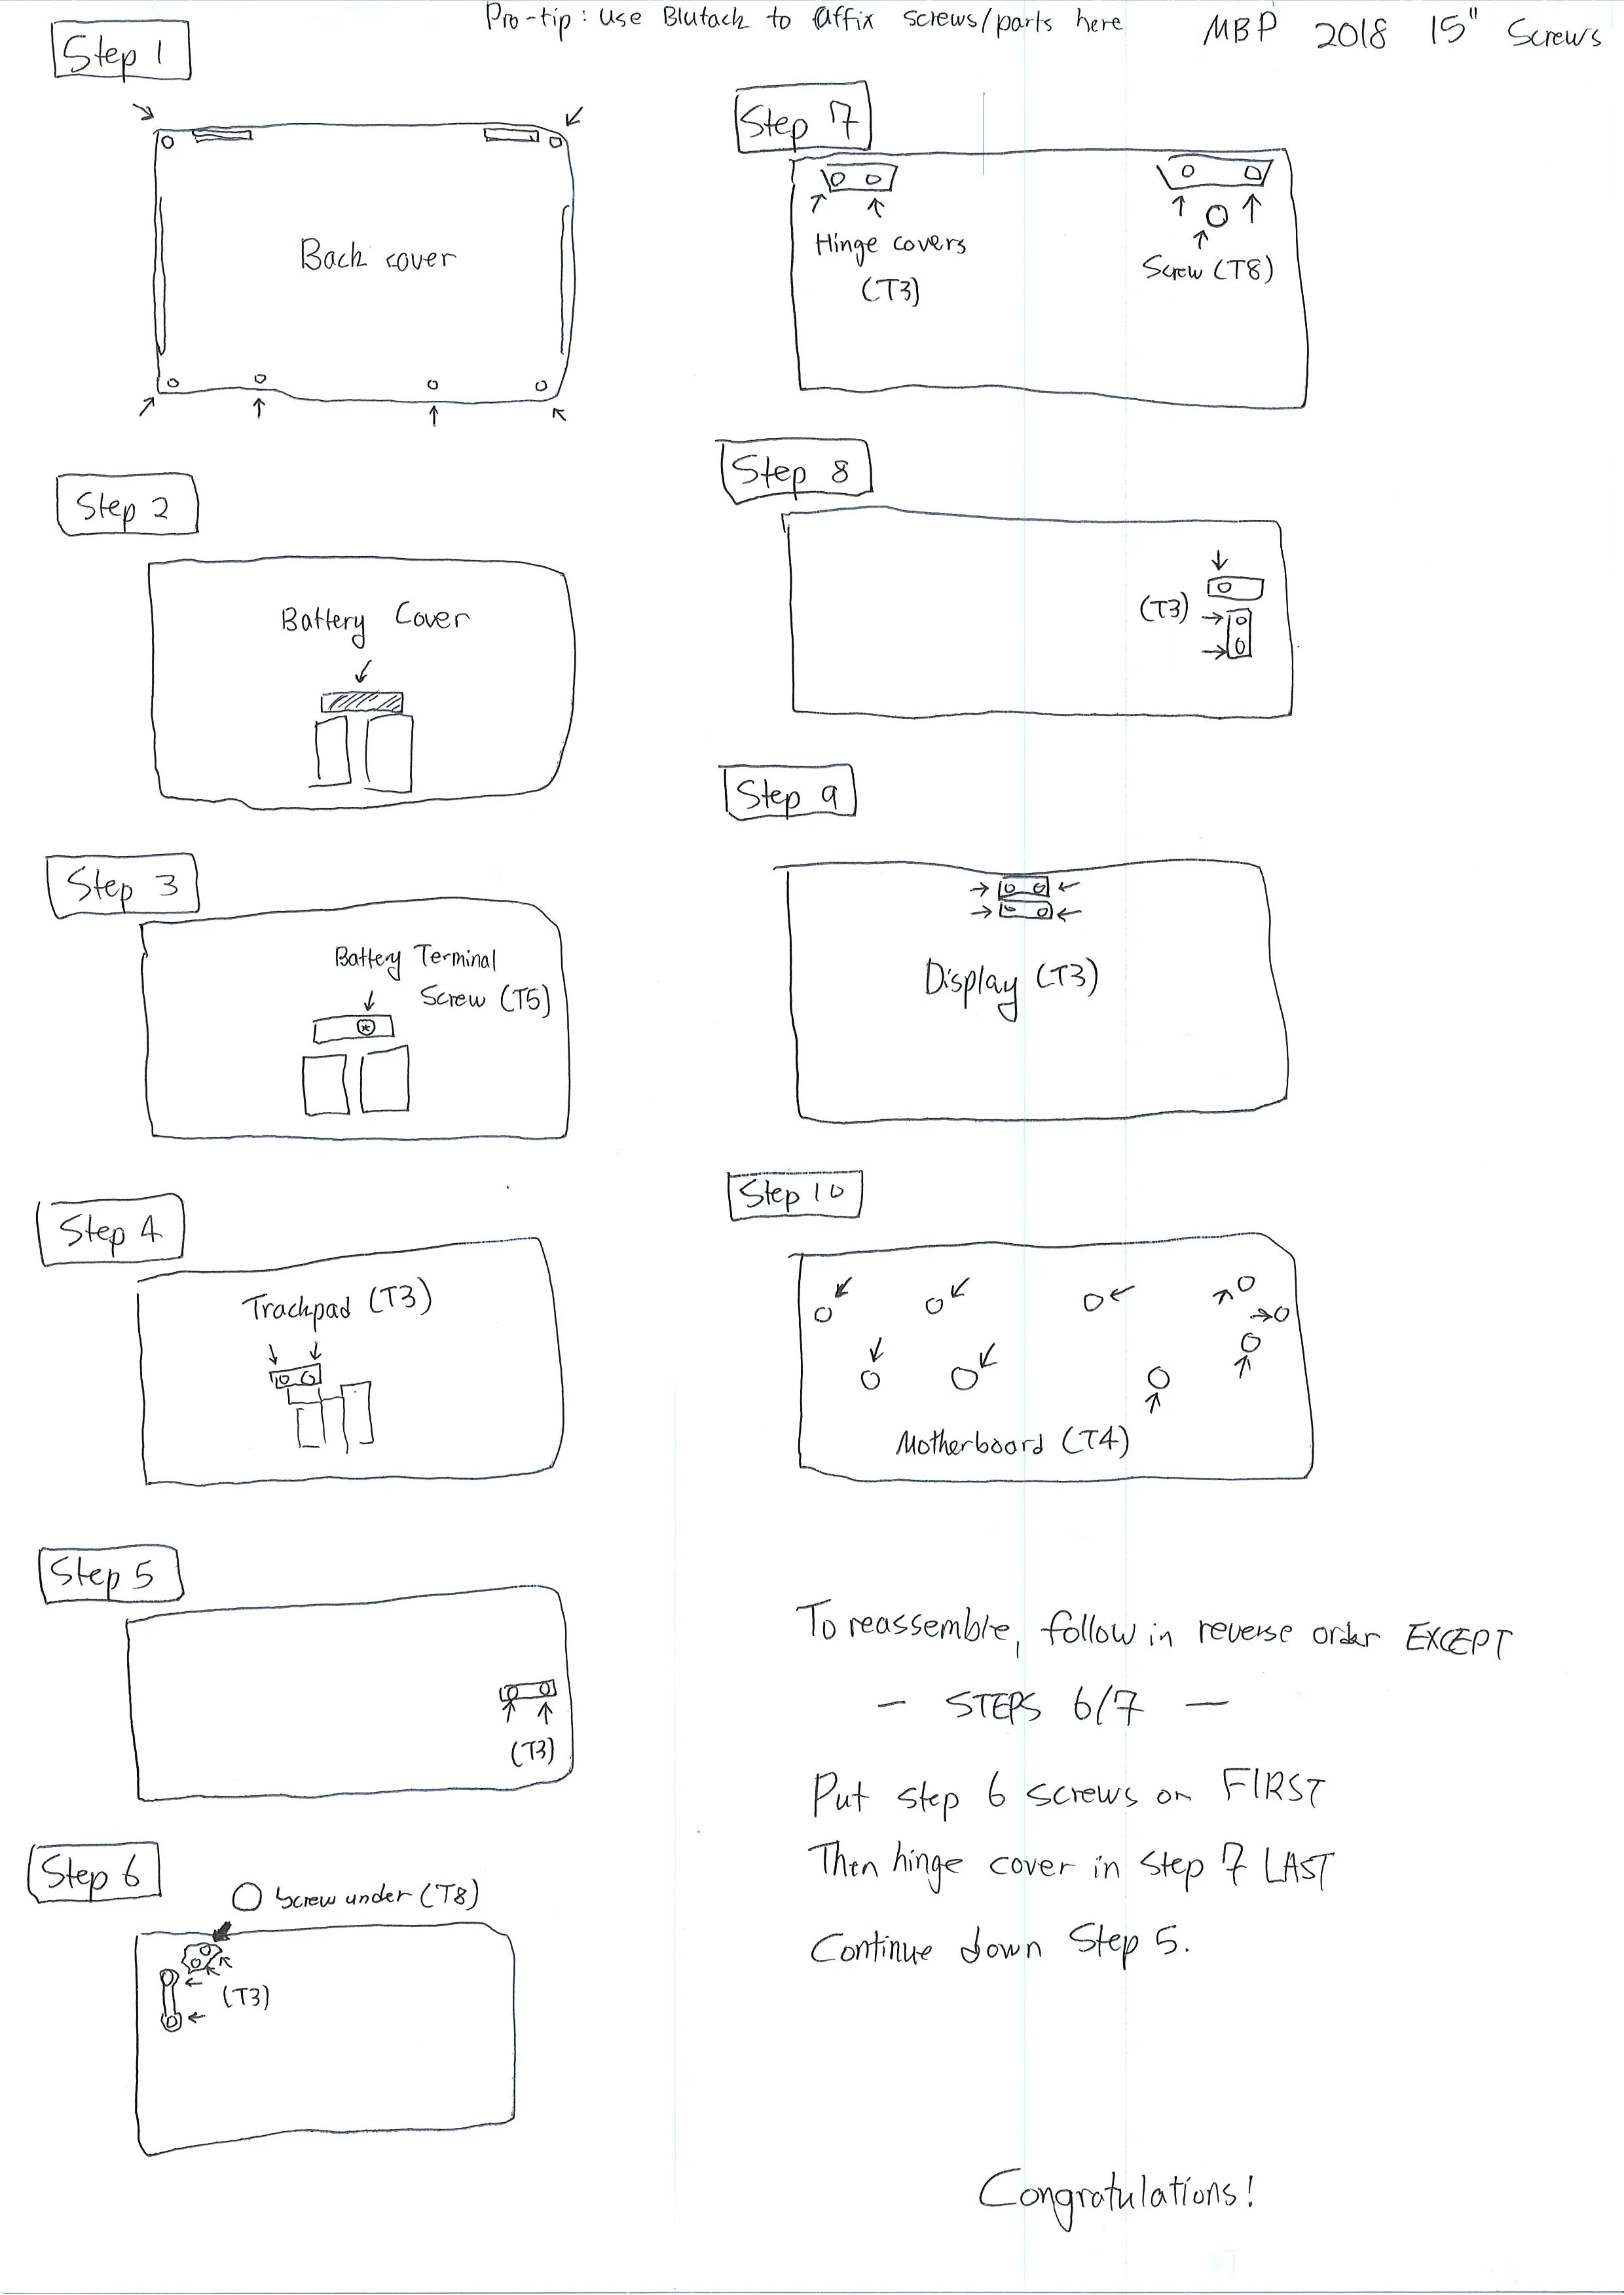
And by the way, here is a screw organizer:

You’ll need it if you’re attempting this crazy thing. Pay attention to all the different screw types. P5 is Pentalobe, and the various types with the T- suffix are the Torx types.
Remember to stick the screws exactly where it indicates on the paper, as you’ll find different length-ed screws literally everywhere, particularly in step 1, step 6, step 7, and step 10. I used Blu-tack so that the screws wouldn’t fall off and disappear into the fourth dimension, as all screws tend to do that when I ever do a disassembly project.
Be extremely careful with the ribbon cables. They are very fragile and I almost tore some of them. Go extremely slowly, and don’t use any force whatsoever.
Good luck!